No Sweat....
All right, I was just trying to come up with a good title. This actually the story of a great deal of toiling.
For years, I have dreamed of putting radiant floor heating into my private quarters and having another bathroom. When I bought this house, the section of the house where my bedroom is (the Elle) was heated by a beat up forced hot air furnace while the main house has a steam boiler. The Elle also had one of the three bathrooms and it's own kitchen. I never liked the hot air furnace, and stopped using it early in my career here. The Elle bathroom was in tough shape anyway, and I wasn't using the Elle Kitchen, so I shut off the water supply to the Elle and toughed it out in the winter with no heat in my bedroom. It meant my bedroom could get down into the forties in the dead of winter. It encouraged me to be more social and not hang out in my bedroom. It also saved me a lot of money not heating the Elle.
Lately, though, I have needed more space and another bathroom would be really nice. My Fiancee has moved in and we now have a baby. Setting up the Elle as our private quarters with a bathroom and kitchen has a lot of appeal. And heat, yah, heat would be nice also.
Like I said, for years, I have been working at renovating that bathroom (I tore the subfloor out about four years ago) and the radiant floor heating has been a long time goal. I have had most of the parts for years. I bought a system from The Radiant Floor company, about $500 for tubing, a circulator and the valves. I already have two heat sources, my oil fired hot water heater and a heat exchanger in my steam boiler. I think I could use either, but I am going with the hotwater heater so I have alternatives in the future. It wouldn't be a big deal to go the other way at some point if I decided to.
And that's how this project went. I started out thinking about the plumbing for a bathroom. But I ended up planning (and executing) revamping the major plumbing of the house to include this radiant floor and the bathroom. All I needed to do was run new hot and cold water lines for the bathroom and attach them to the existing plumbing. But I really wanted to move the lines to the hotwater heater (they were at chest height across my new entry to the Elle basement) and adding the Radiant floor in one fell swoop would save some labor, and I really wanted to revamp the headers for dividing the water through out the house... You get the picture. Basically, I wanted to fix the hodge podge of plumbing that has been changed and added to over the last hundred years and I want to add two major pieces, the bathroom and radiant floor. It was a lot more than had originally envisioned, but it all needed to happen.
After picking up at least fifty fittings, about 10 valves and 100 feet of copper pipe (almost $500 at home depot, copper is at a peak), I was ready to start. In general, I figure I am mechanically inclined and competent, but I thought this was going to get this done in a day or two. It took more like five long days. And I am not the plumber I was thinking I was. Sweating copper fittings was never my favorite thing, but I thought I was reasonably good at it. But I am not. Luckily, I air pressure tested the plumbing before I turned the water back on. Lucky, because some of my joints were not quite up to par (they leaked) and I just forgot to solder one joint. In my defense, there were at least 100 joints to solder, even 99 % accuracy would have meant one that needed to be addressed. Setting up a little pressure test unit with a gauge and quick disconnect to my compressor was well worth while. There is nothing worse than trying to dry out your plumbing to re-solder a joint...
So what did I learn? I suppose I already knew this, but the general rules of sweating pipe are:
- Dry clean surfaces, both fittings and pipe. Nothing spoils a secure fitting like water or dirt in the joint.
- Flux. It helps clean the metal and allows the solder to bond with it. Without flux, you get a gob of solder that has cooled off surrounding the pipe, but really isn't sticking to it.
- Even heat. Spread the heat around to both the fitting and pipe.
- Solder follows the heat. My highschool shop teacher told me this. I don't know all the ins outs of it, but it appears to be true. So make sure you apply heat to the fitting were you want the solder to follow the pipe into.
As a home owner, I think it is important to be able do at least a little soldering in case of emergency. And it's worth finding out how before you need to use those skills. A frozen pipe or piercing a pipe when doing some renovations is a definite possibility. I would suggest keeping a tank of MAPP gas (burns hotter than propane) solder, flux and a small selection of fittings on hand in case of emergency. A couple of connectors, elbows, caps and maybe a T and a ball valve would not be a big investment. Keep them in a sealed plastic bag to keep them from corroding. And try it out on a minor project so you'll be able to do it in a pinch. It doesn't need to be pretty, just quick and relatively leak free. I would also suggest checking your shutoff valves to see if they really shut off. Those old twist shut off valves depend on rubber seats and packing that deteriate over time. Good brass ball valves are much more reliable.
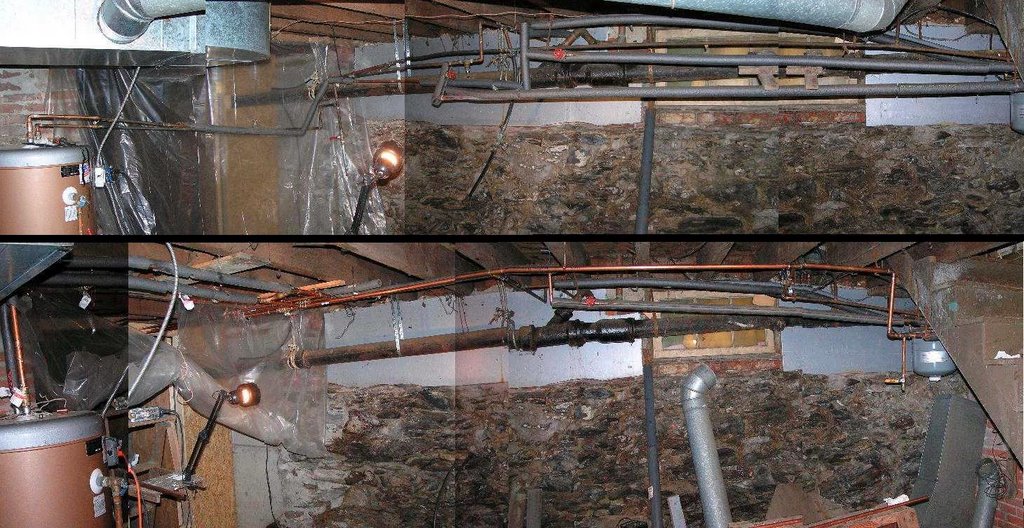
In the before and after pictures above, you can see some of the changes I made in my system.
posted by MMP at
11:47 AM
|
0 comments
![]()


